Après le Kick-Off et le workshop de sensibilisation au Management Visuel, nous voici arrivés au workshop 3 : la mise en oeuvre !
Je décrirais dans cet article comme d’habitude les intentions des différentes activités sélectionnées ainsi que les résultats obtenus.
Les articles liés :
- Agile Rocket : Module Management Visuel
- Workshop 1 : Kick-off
- Workshop 2 : Au Tableau
- Workshop 3 : Mise en oeuvre (Partie 1)
- Workshop 4 : Mise en oeuvre (Partie 2)
- Module Management Visuel : Rétrospective et clôture
Organisation du workshop
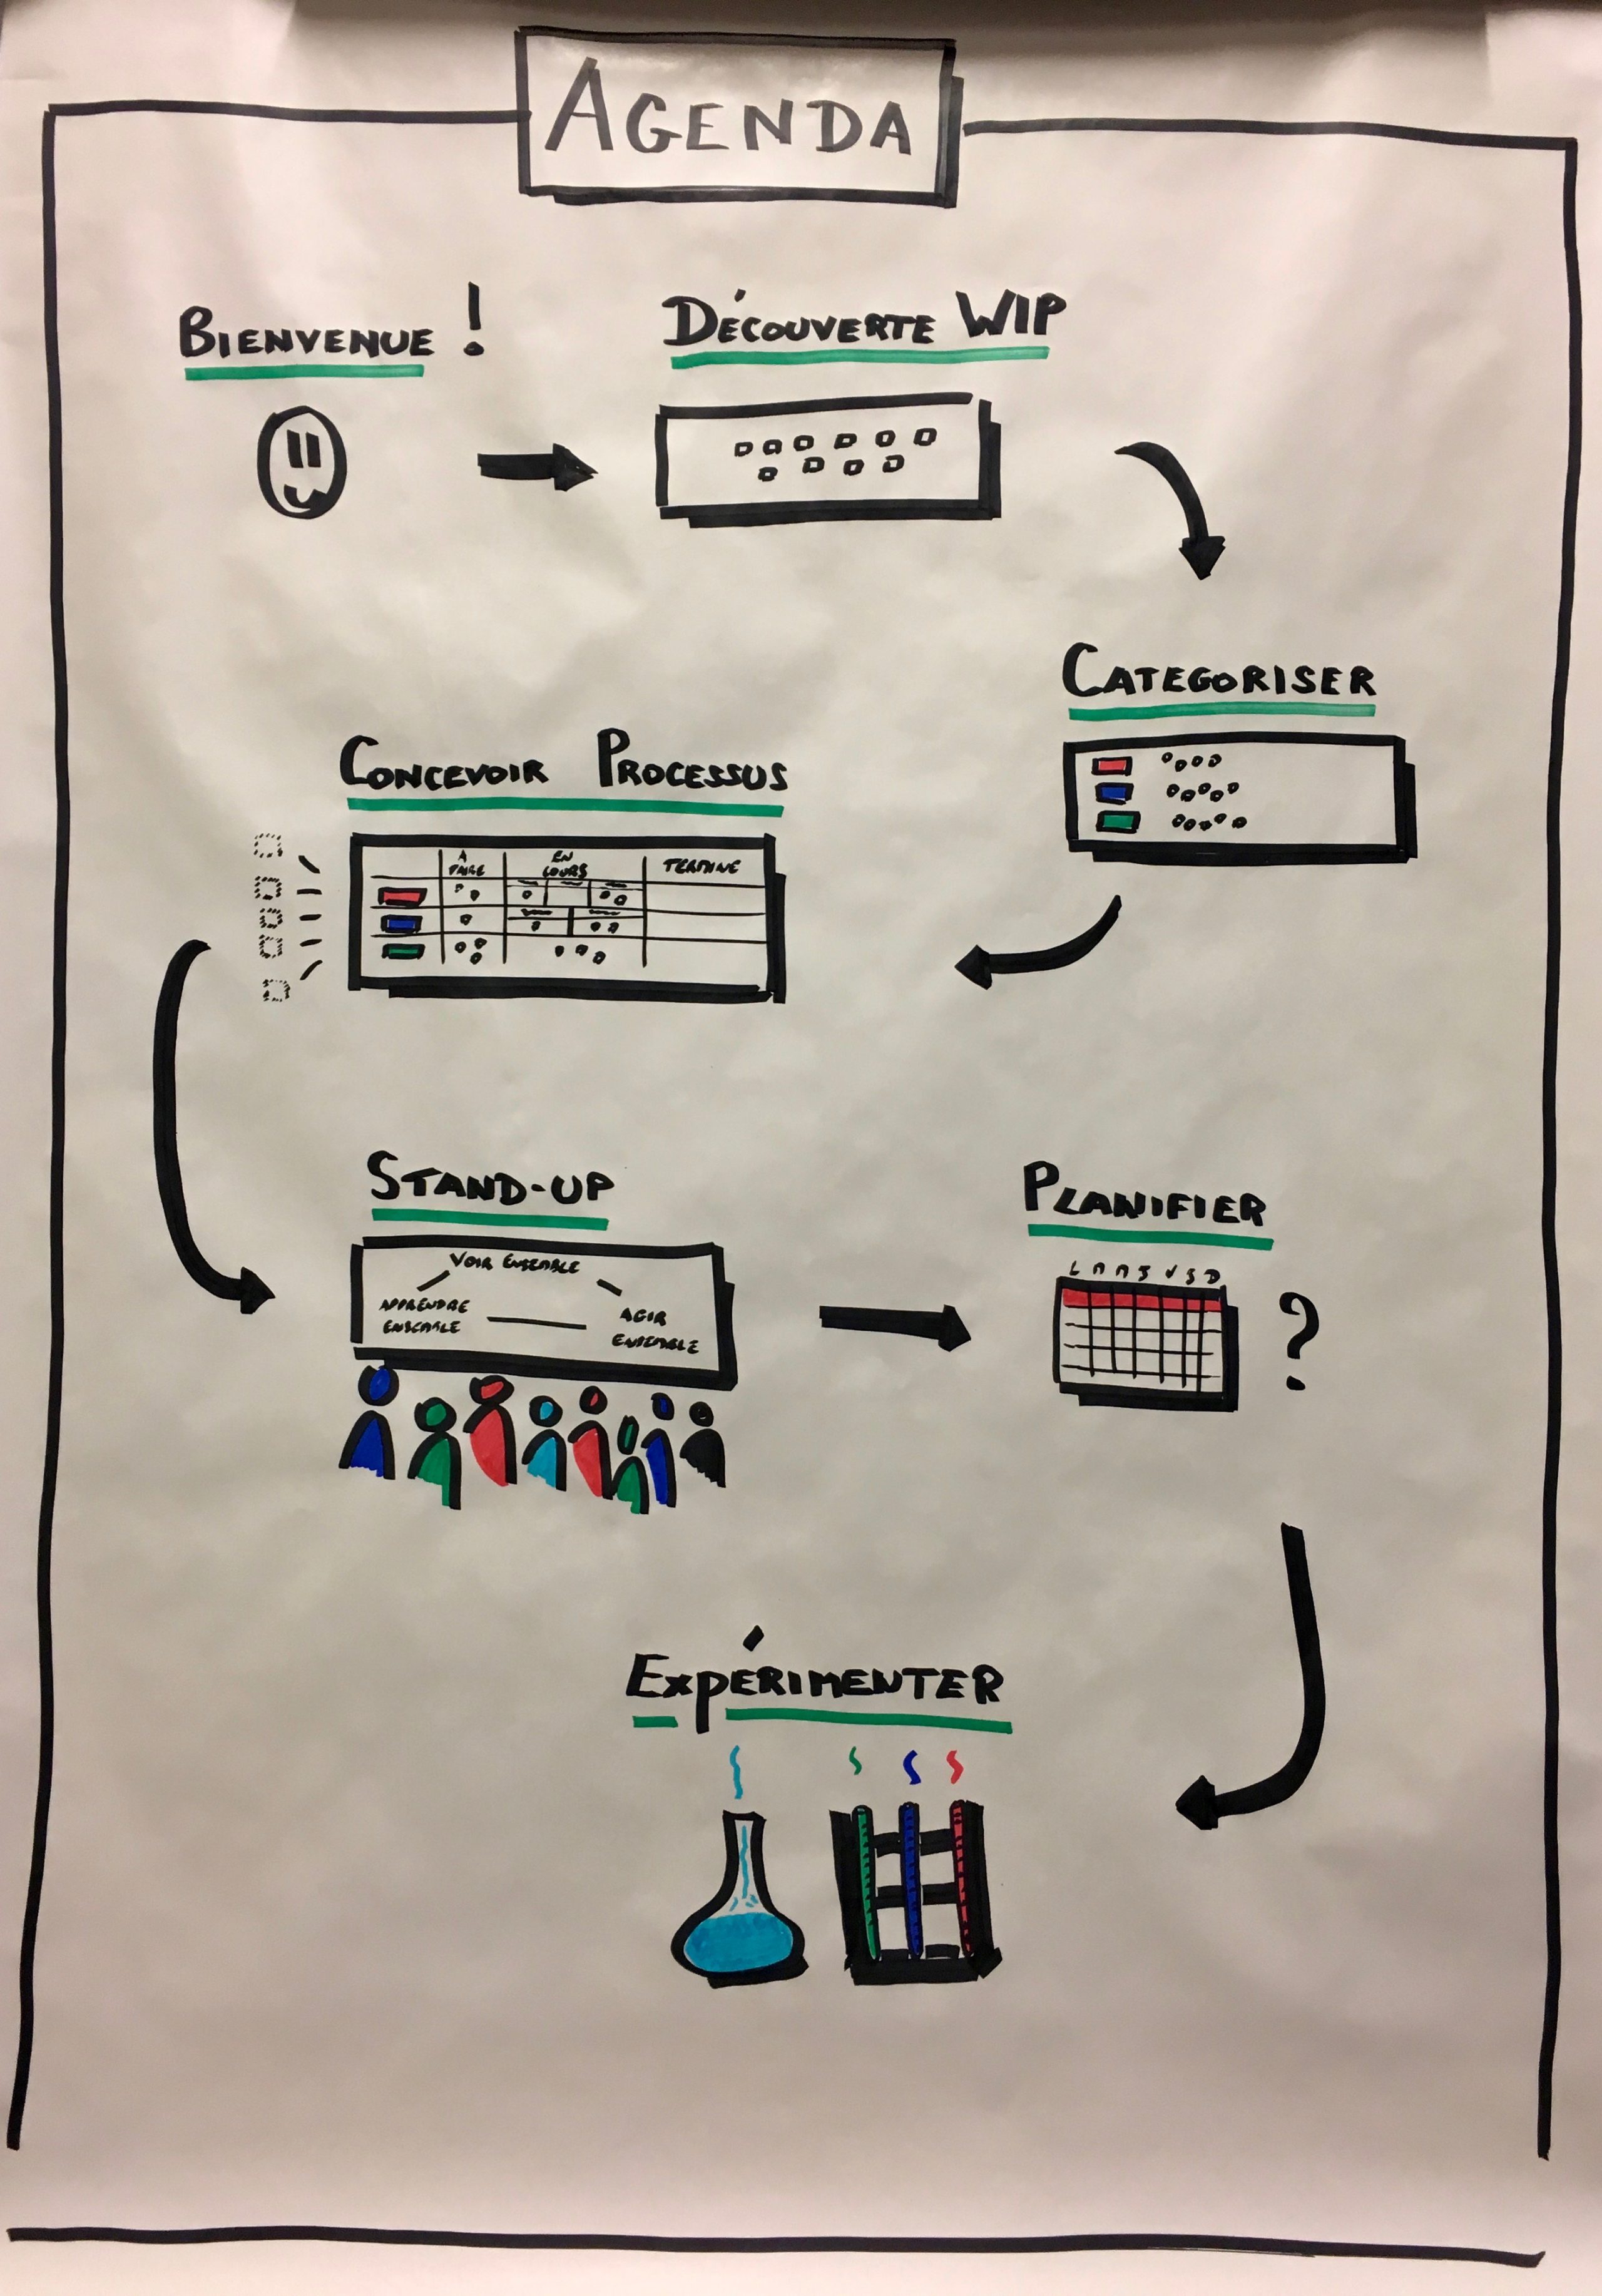
L’intention ici est d’amener les participants à construire une première version actionnable de Management Visuel. Comme dans tout atelier, il est important d’aider les participants à comprendre l’objectif de la session : le montrer visuellement est la plupart du temps très efficace ! On voit donc clairement les étapes du processus de construction et la manière dont le tableau va au fur et à mesure évoluer dans la première partie. La seconde partie correspond à la partie « actionnable » de l’intention.
Note : L’objectif du module étant de transformer une sommes d’individus en un collectif, le processus de construction a tout autant d’importance que le résultat. On cherche alors au maximum à mettre un cadre dans lequel les personnes vont devoir agir en tant que groupe et prendre des décisions ensemble.
Étape 1 : Découverte du WIP
« Mettons en lumière tout le travail en cours de l’équipe ! »
Je demande alors aux participants d’inscrire sur un Post-it les sujets sur lesquels ils travaillent en ce moment. Généralement, environ 5-7 minutes suffisent, on ne cherche pas ici à être exhaustif.
Je rappelle les règles suivantes :
- On écrit sur un Post-it avec un marqueur (pour que cela soit visible à une certaine distance)
- On n’inscrit qu’une idée par Post-it (pour pouvoir les manipuler plus facilement par la suite)
Note : On ne fait pas la course à qui aura la plus longue (liste) ! L’important est surtout de voir ce qui représente la réalité d’aujourd’hui.
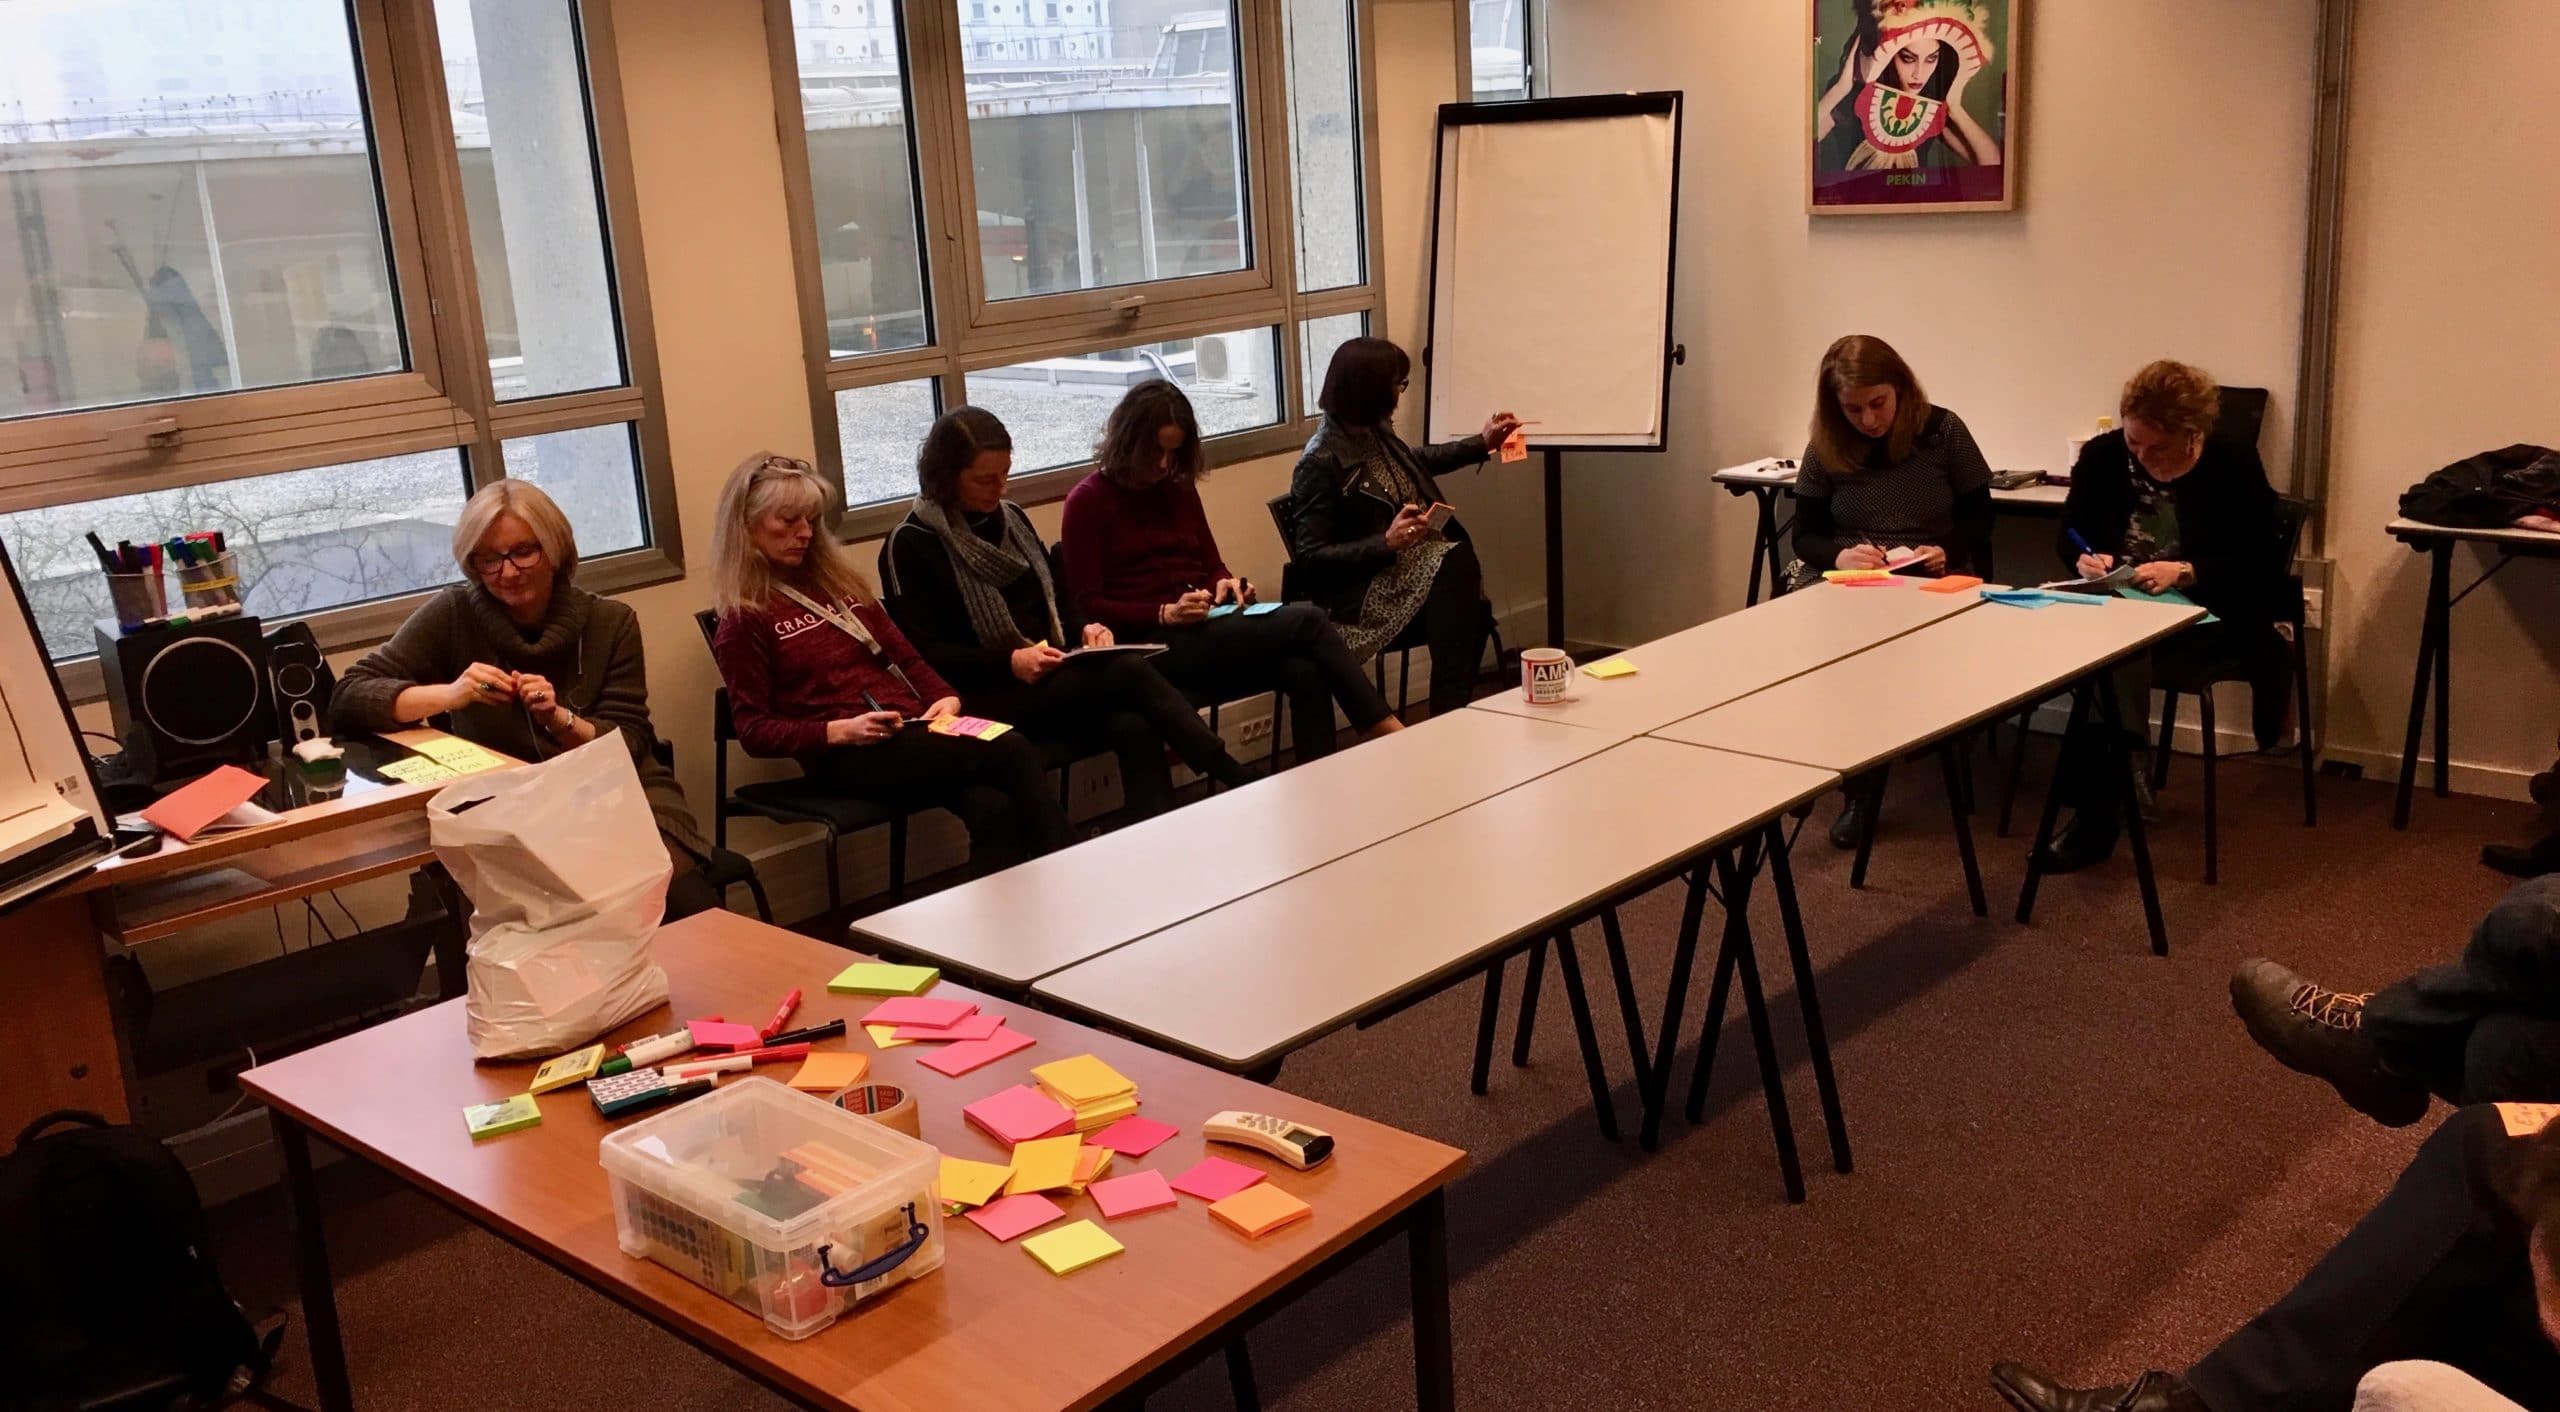
Lorsque le temps est écoulé ou lorsque les participants semblent avoir terminé, je les invite à venir afficher leurs productions.
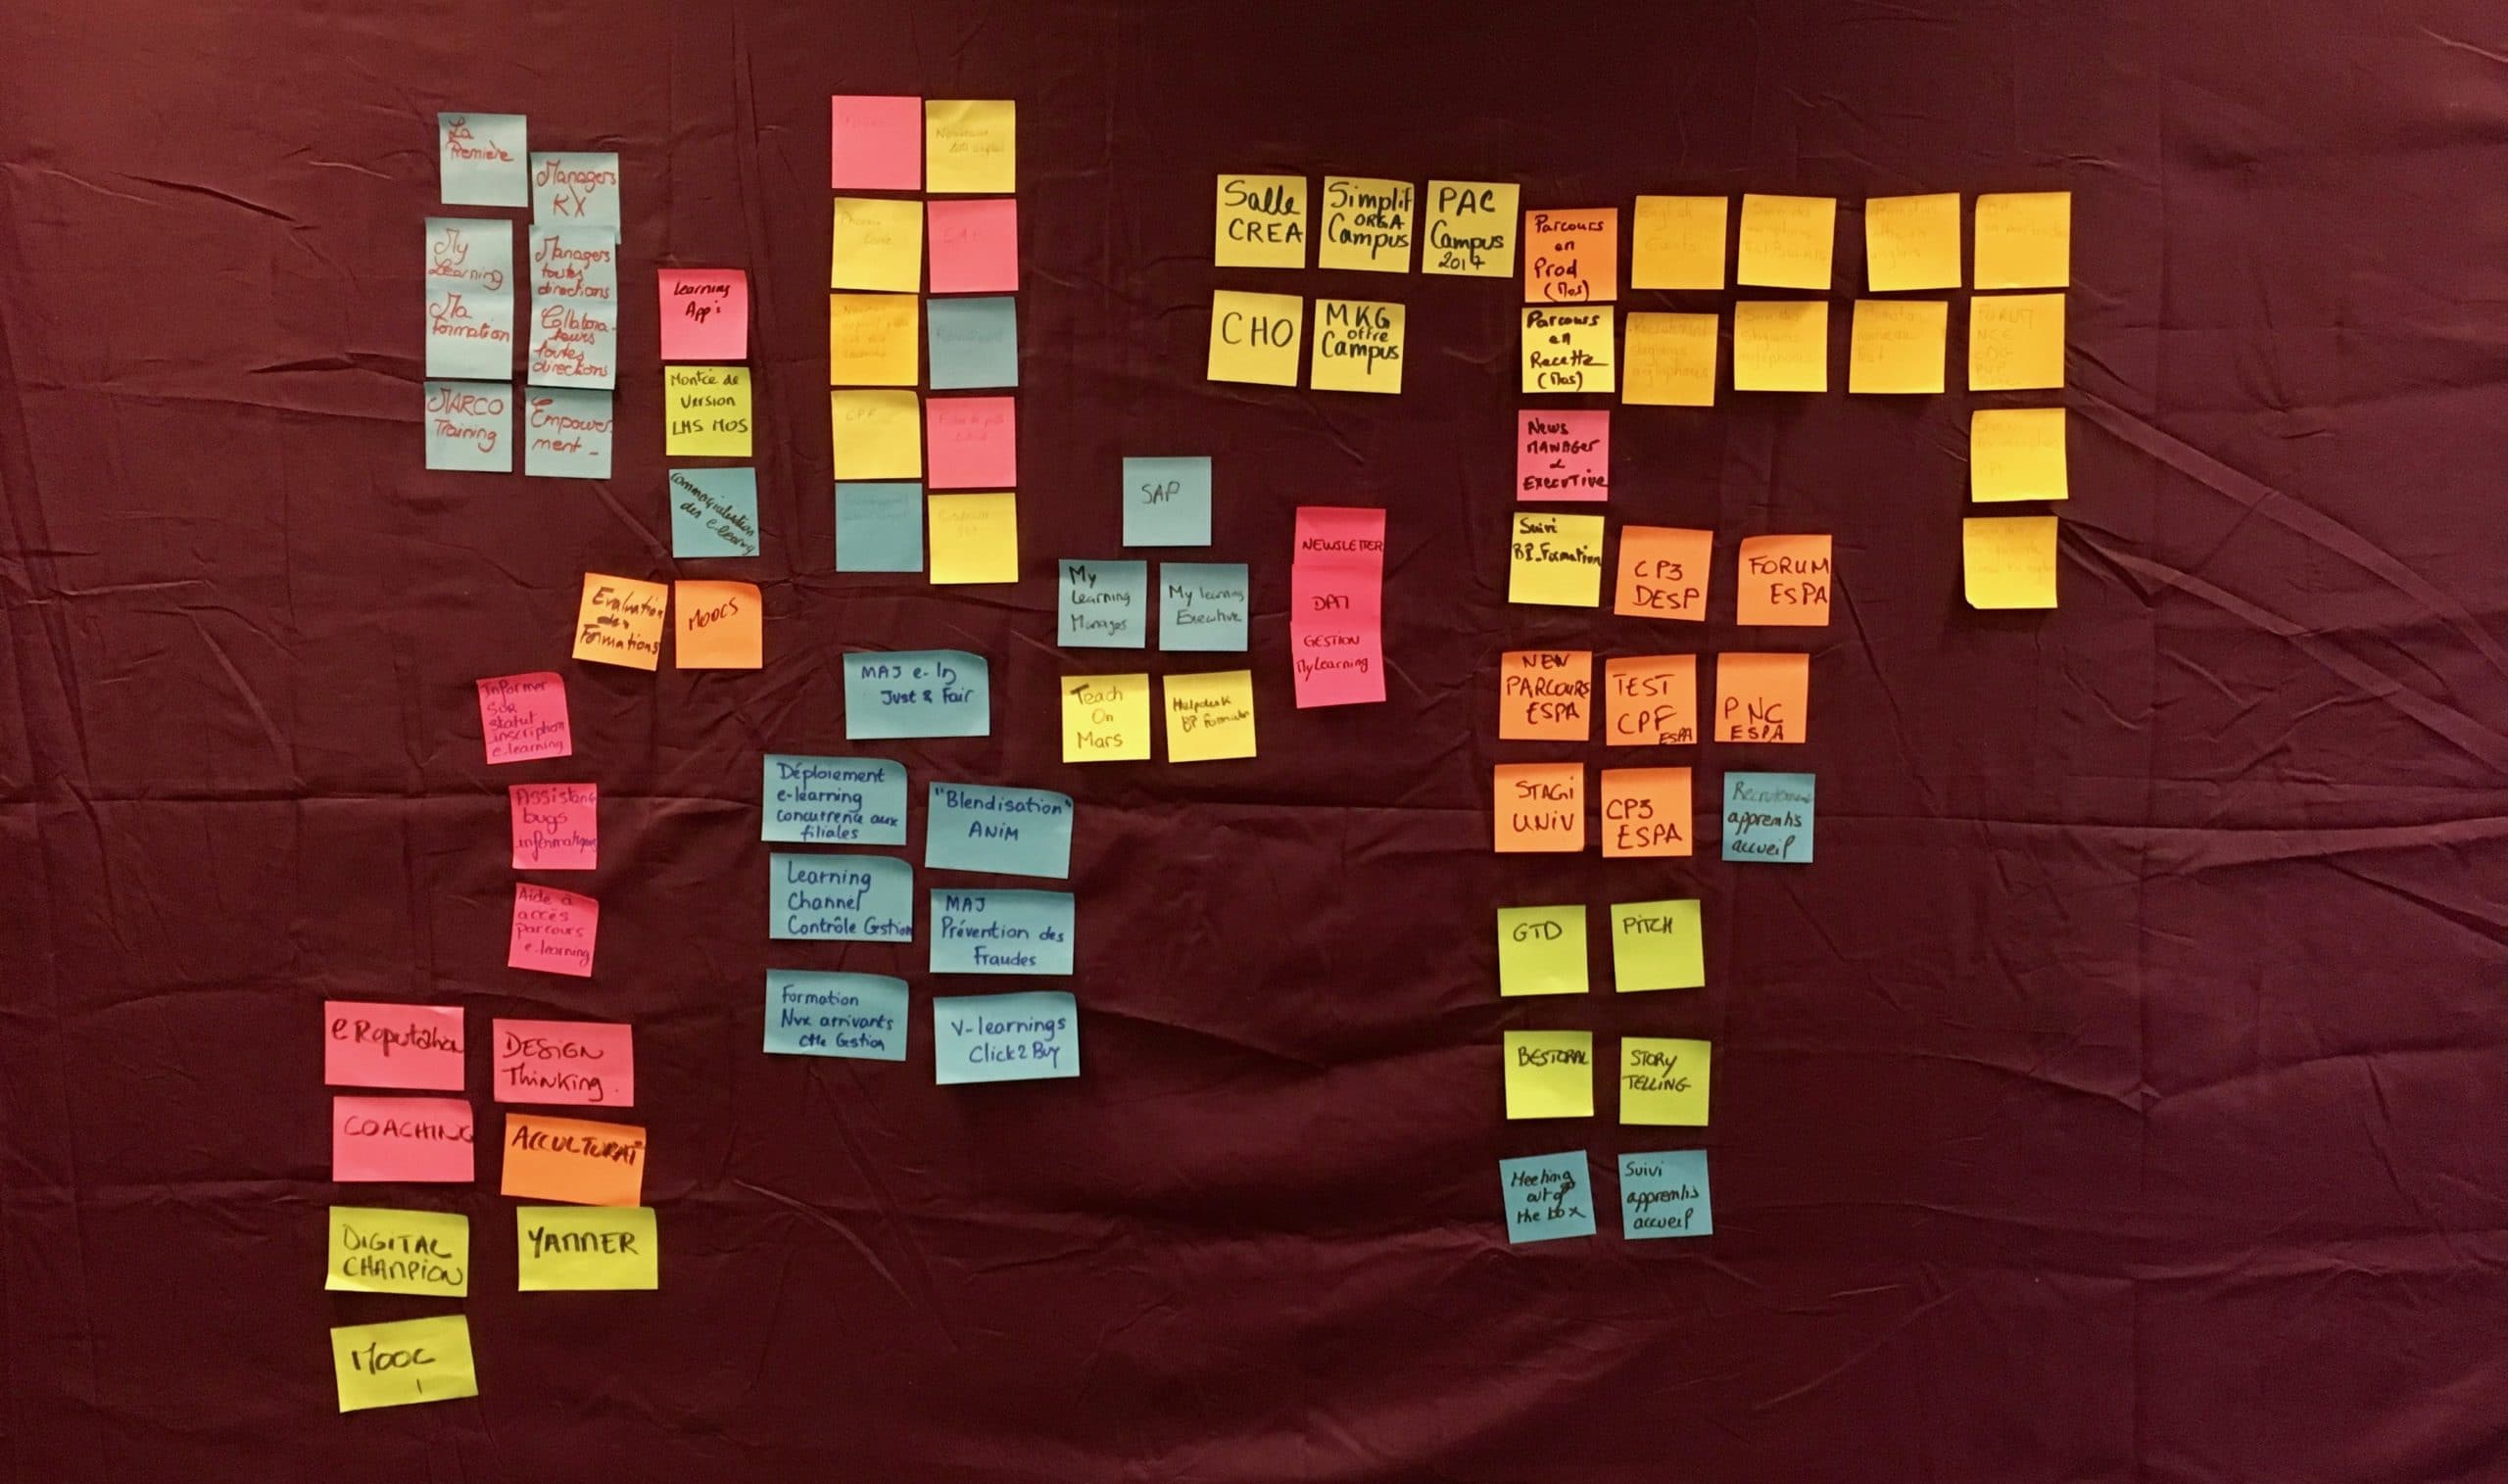
Il m’apparait alors intéressant de sonder le ressenti du groupe :
Que ressentez-vous à la vue de tout ce travail ?
Est-ce ce que vous imaginiez ?
Les participants paraissent étonnés, il émerge des échanges permettant une première prise de conscience du groupe sur l’ensemble du travail qu’il prend en charge aujourd’hui.
Étape 2 : Catégorisation
Après avoir mis en lumière l’ensemble du travail en cours, j’invite les participants à regrouper les éléments du même « type » ensemble. Le terme « type » n’est pas toujours très clair donc je parle parfois d’éléments « qui se ressemblent ». Un des challenges de la facilitation est d’être suffisamment précis pour mettre les personnes en mouvement mais suffisamment vague pour laisser libre cours à la créativité et à l’intelligence collective du groupe.
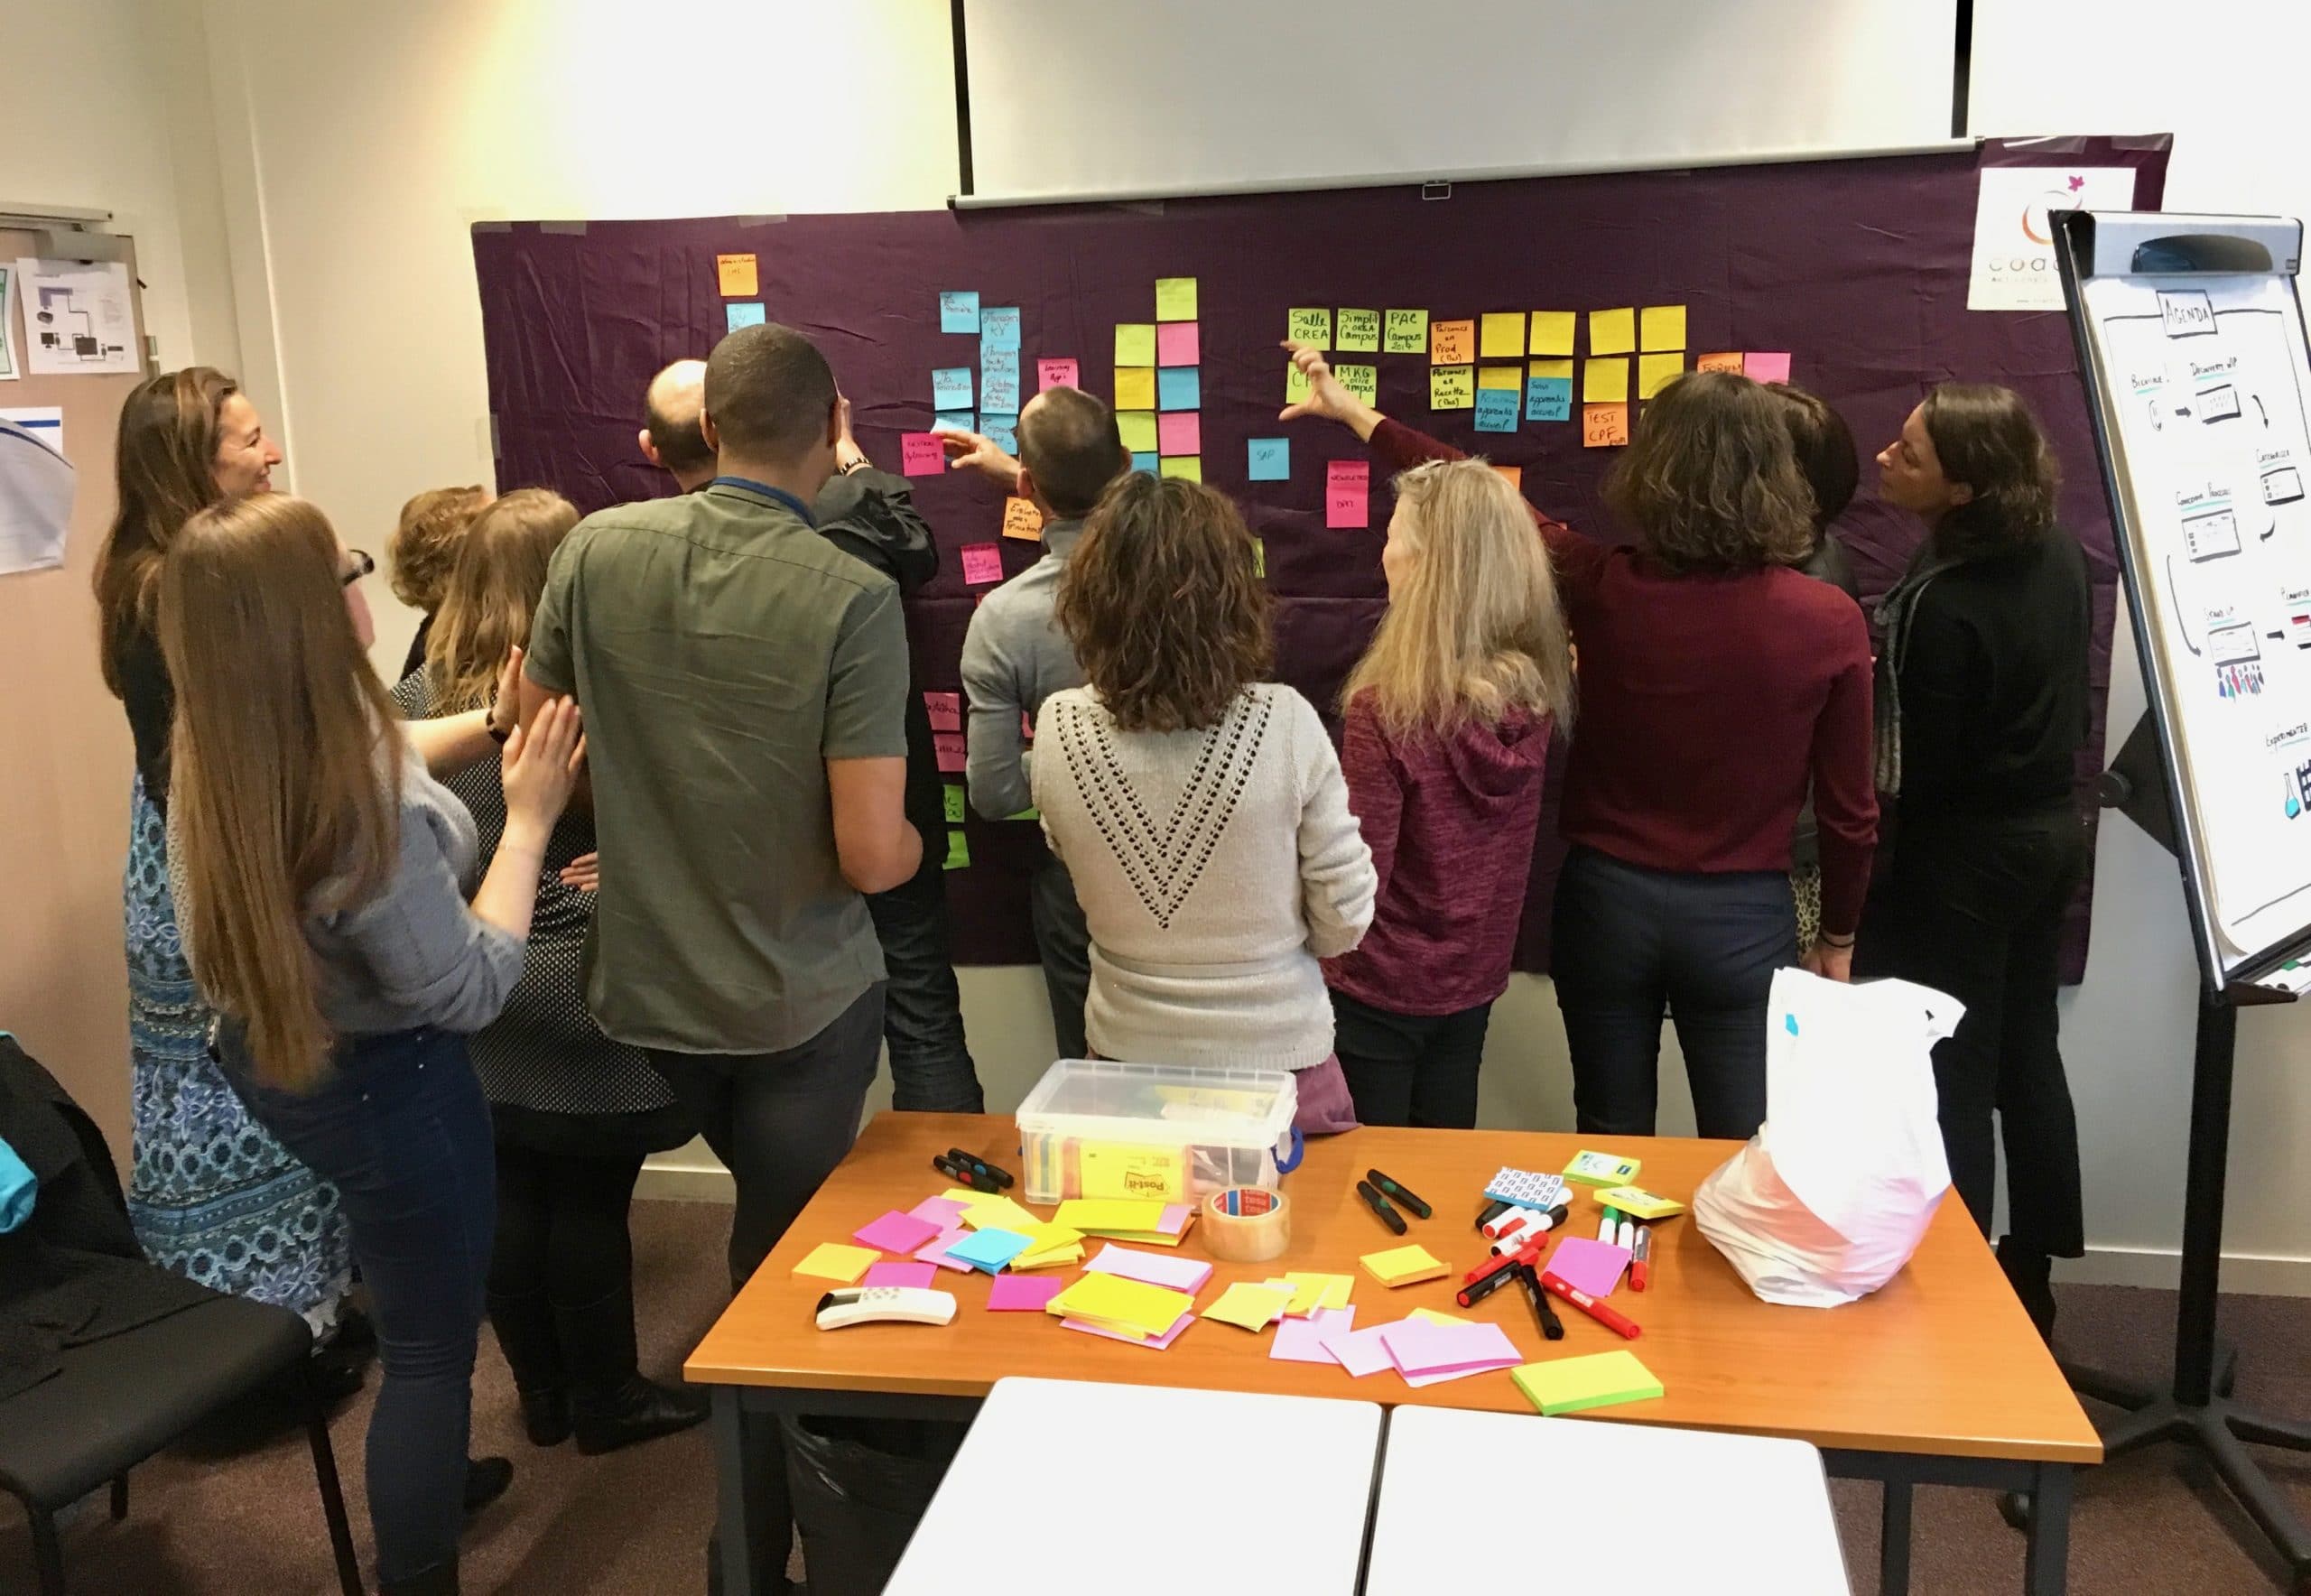
Pendant une dizaine de minutes, je me mets volontairement en retrait, en observateur. Les échanges se multiplient, les post-its se déplacent et la magie opère. Le support mural a un véritablement impact sur la dynamique de groupe pour ce genre d’exercice : on commence à créer une habitude de mise en action du groupe sur un support visuel ! 😉
Après une petite réorganisation, voici le résultat obtenu :
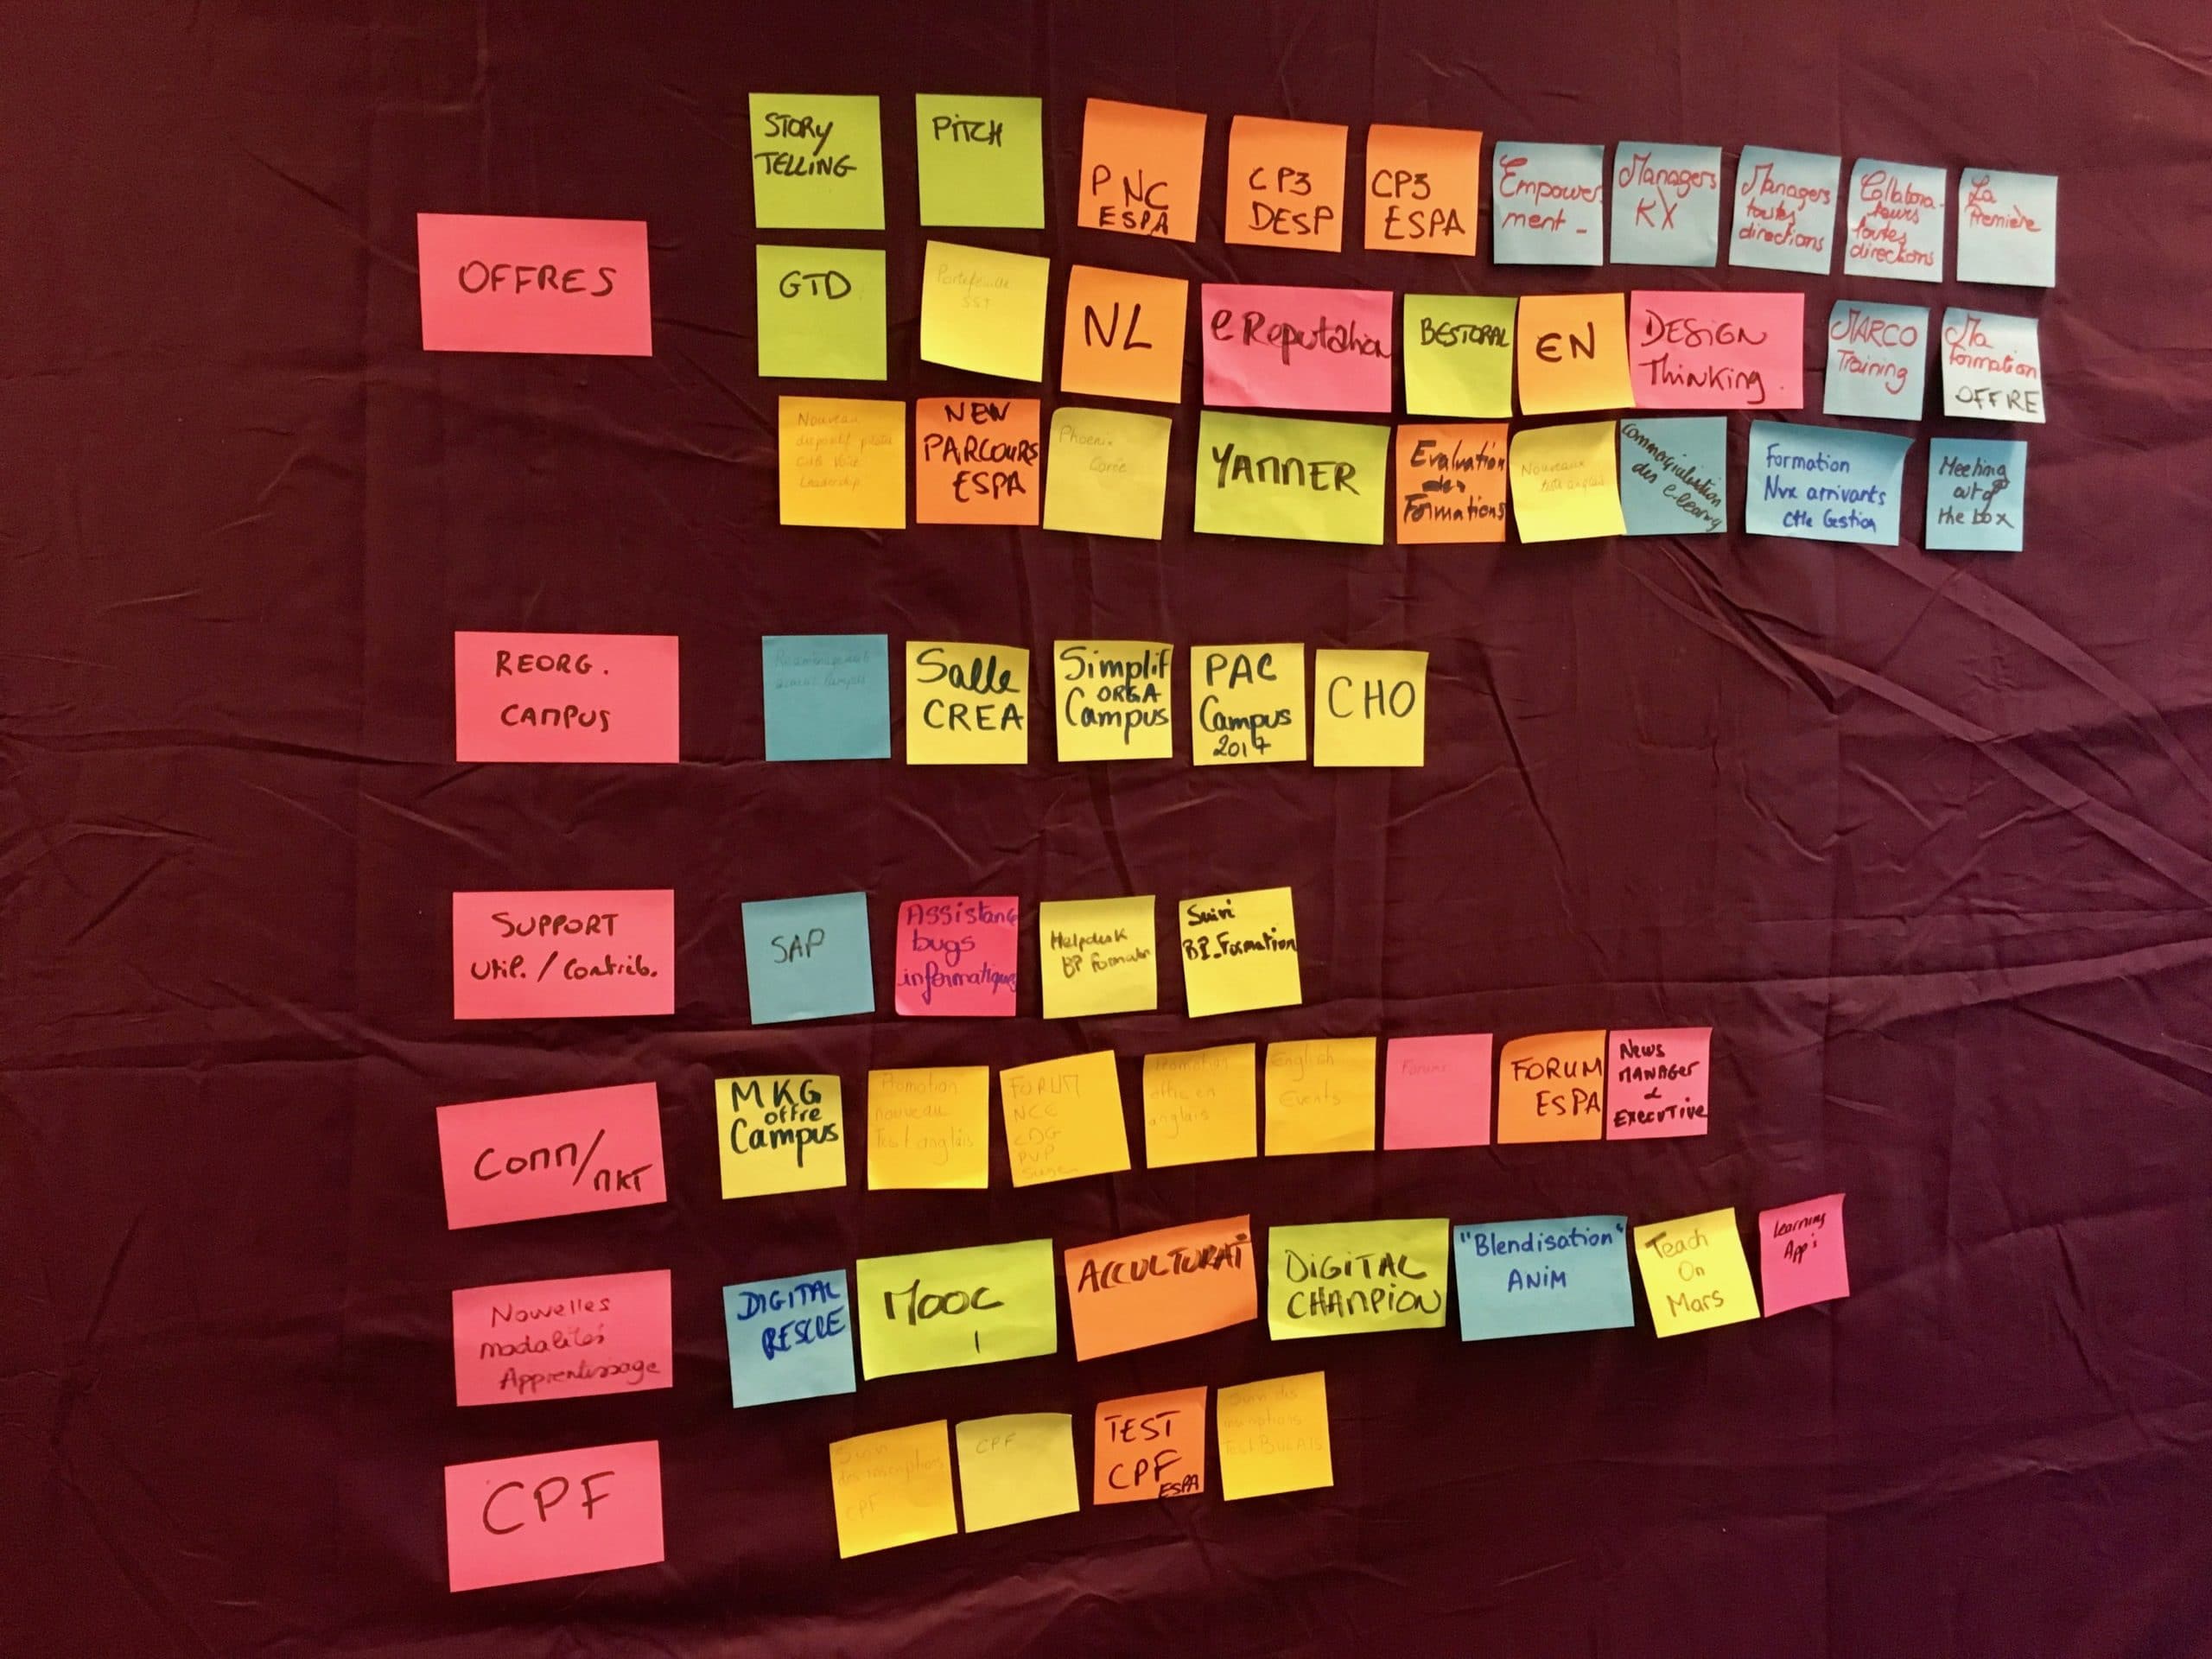
Chaque groupe comporte ainsi une entête permettant de l’identifier. On commence à structurer et à organiser le travail.
Étape 3 : Conception du processus
Les regroupements effectués, on se lance dans la phase de description du processus.
J’invite les participants à former des sous-groupes, de sélectionner une des catégories et de décrire le processus mis en oeuvre pour emmener un élément jusqu’à sa complétion. Un approche peut être de prendre un exemple et de décrire ce qui a été effectué et ce qui reste à faire pour pouvoir le considérer comme terminé.
Une contrainte que j’ai imposée cette fois-ci était d’élaborer au plus 5 étapes : cela permet de limiter l’envie des participants à vouloir construire le processus parfait – qui généralement ne correspond même pas à la réalité mais plutôt à l’idée qu’ils s’en font. Rappelons que l’on veut avant tout représenter la réalité du terrain plutôt que la manière dont les choses devraient être faites dans l’idéal.
Note : Je précise parfois qu’un élément peut de manière générique passer dans les 3 statuts « A faire », « En cours » et « Terminé ». L’objet de cette phase est donc de préciser les étapes constitutives du statut « En cours ».
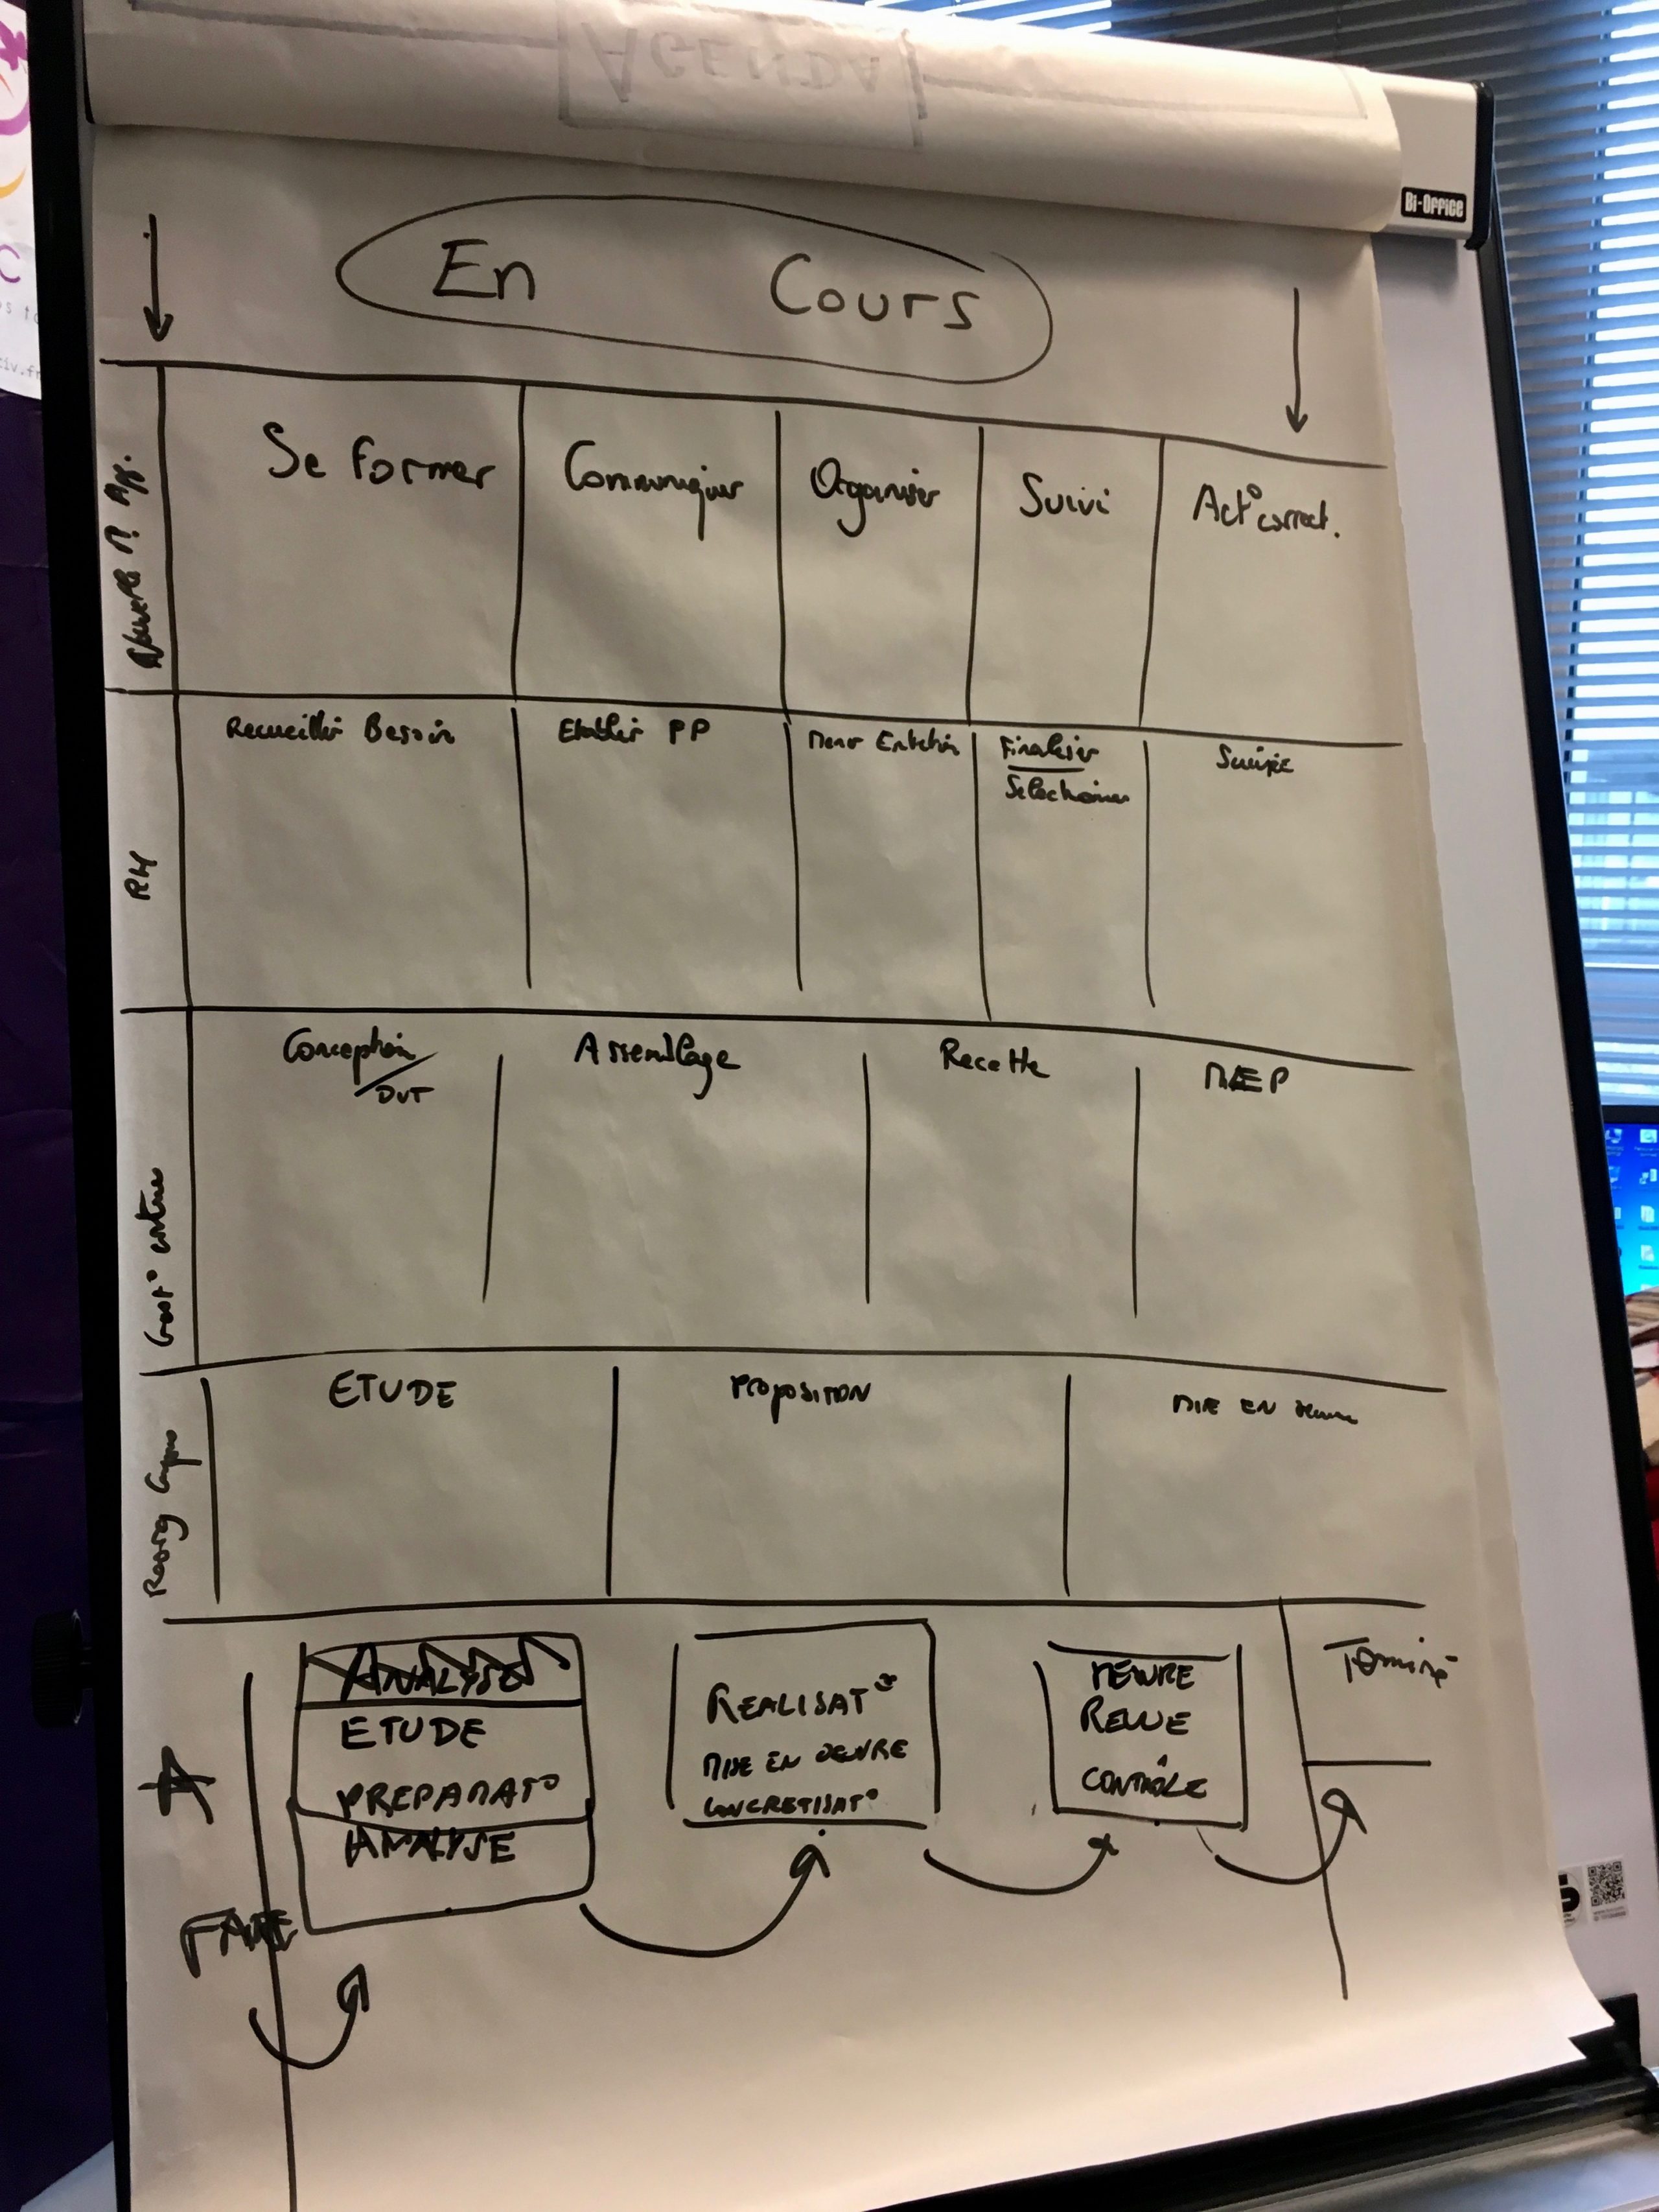
Après un quinzaine de minutes, nous débriefons tous ensemble sur Paperboard. J’inscris les résultats de chaque sous-groupe et invite le groupe complet à repérer des patterns ou des ressemblances dans les étapes évoquées.
On remarque alors qu’il y a fondamentalement 3 étapes qui se démarquent – avec plus ou moins de détails :

Les échanges tournent par la suite plus autour de la terminologie que sur les étapes en elles-mêmes. Je propose alors au groupe de garder différents termes dans un premier temps et avec l’expérimentation, ils verront ce qui sera leur semblera plus utile.
Le résultat devient alors le suivant :
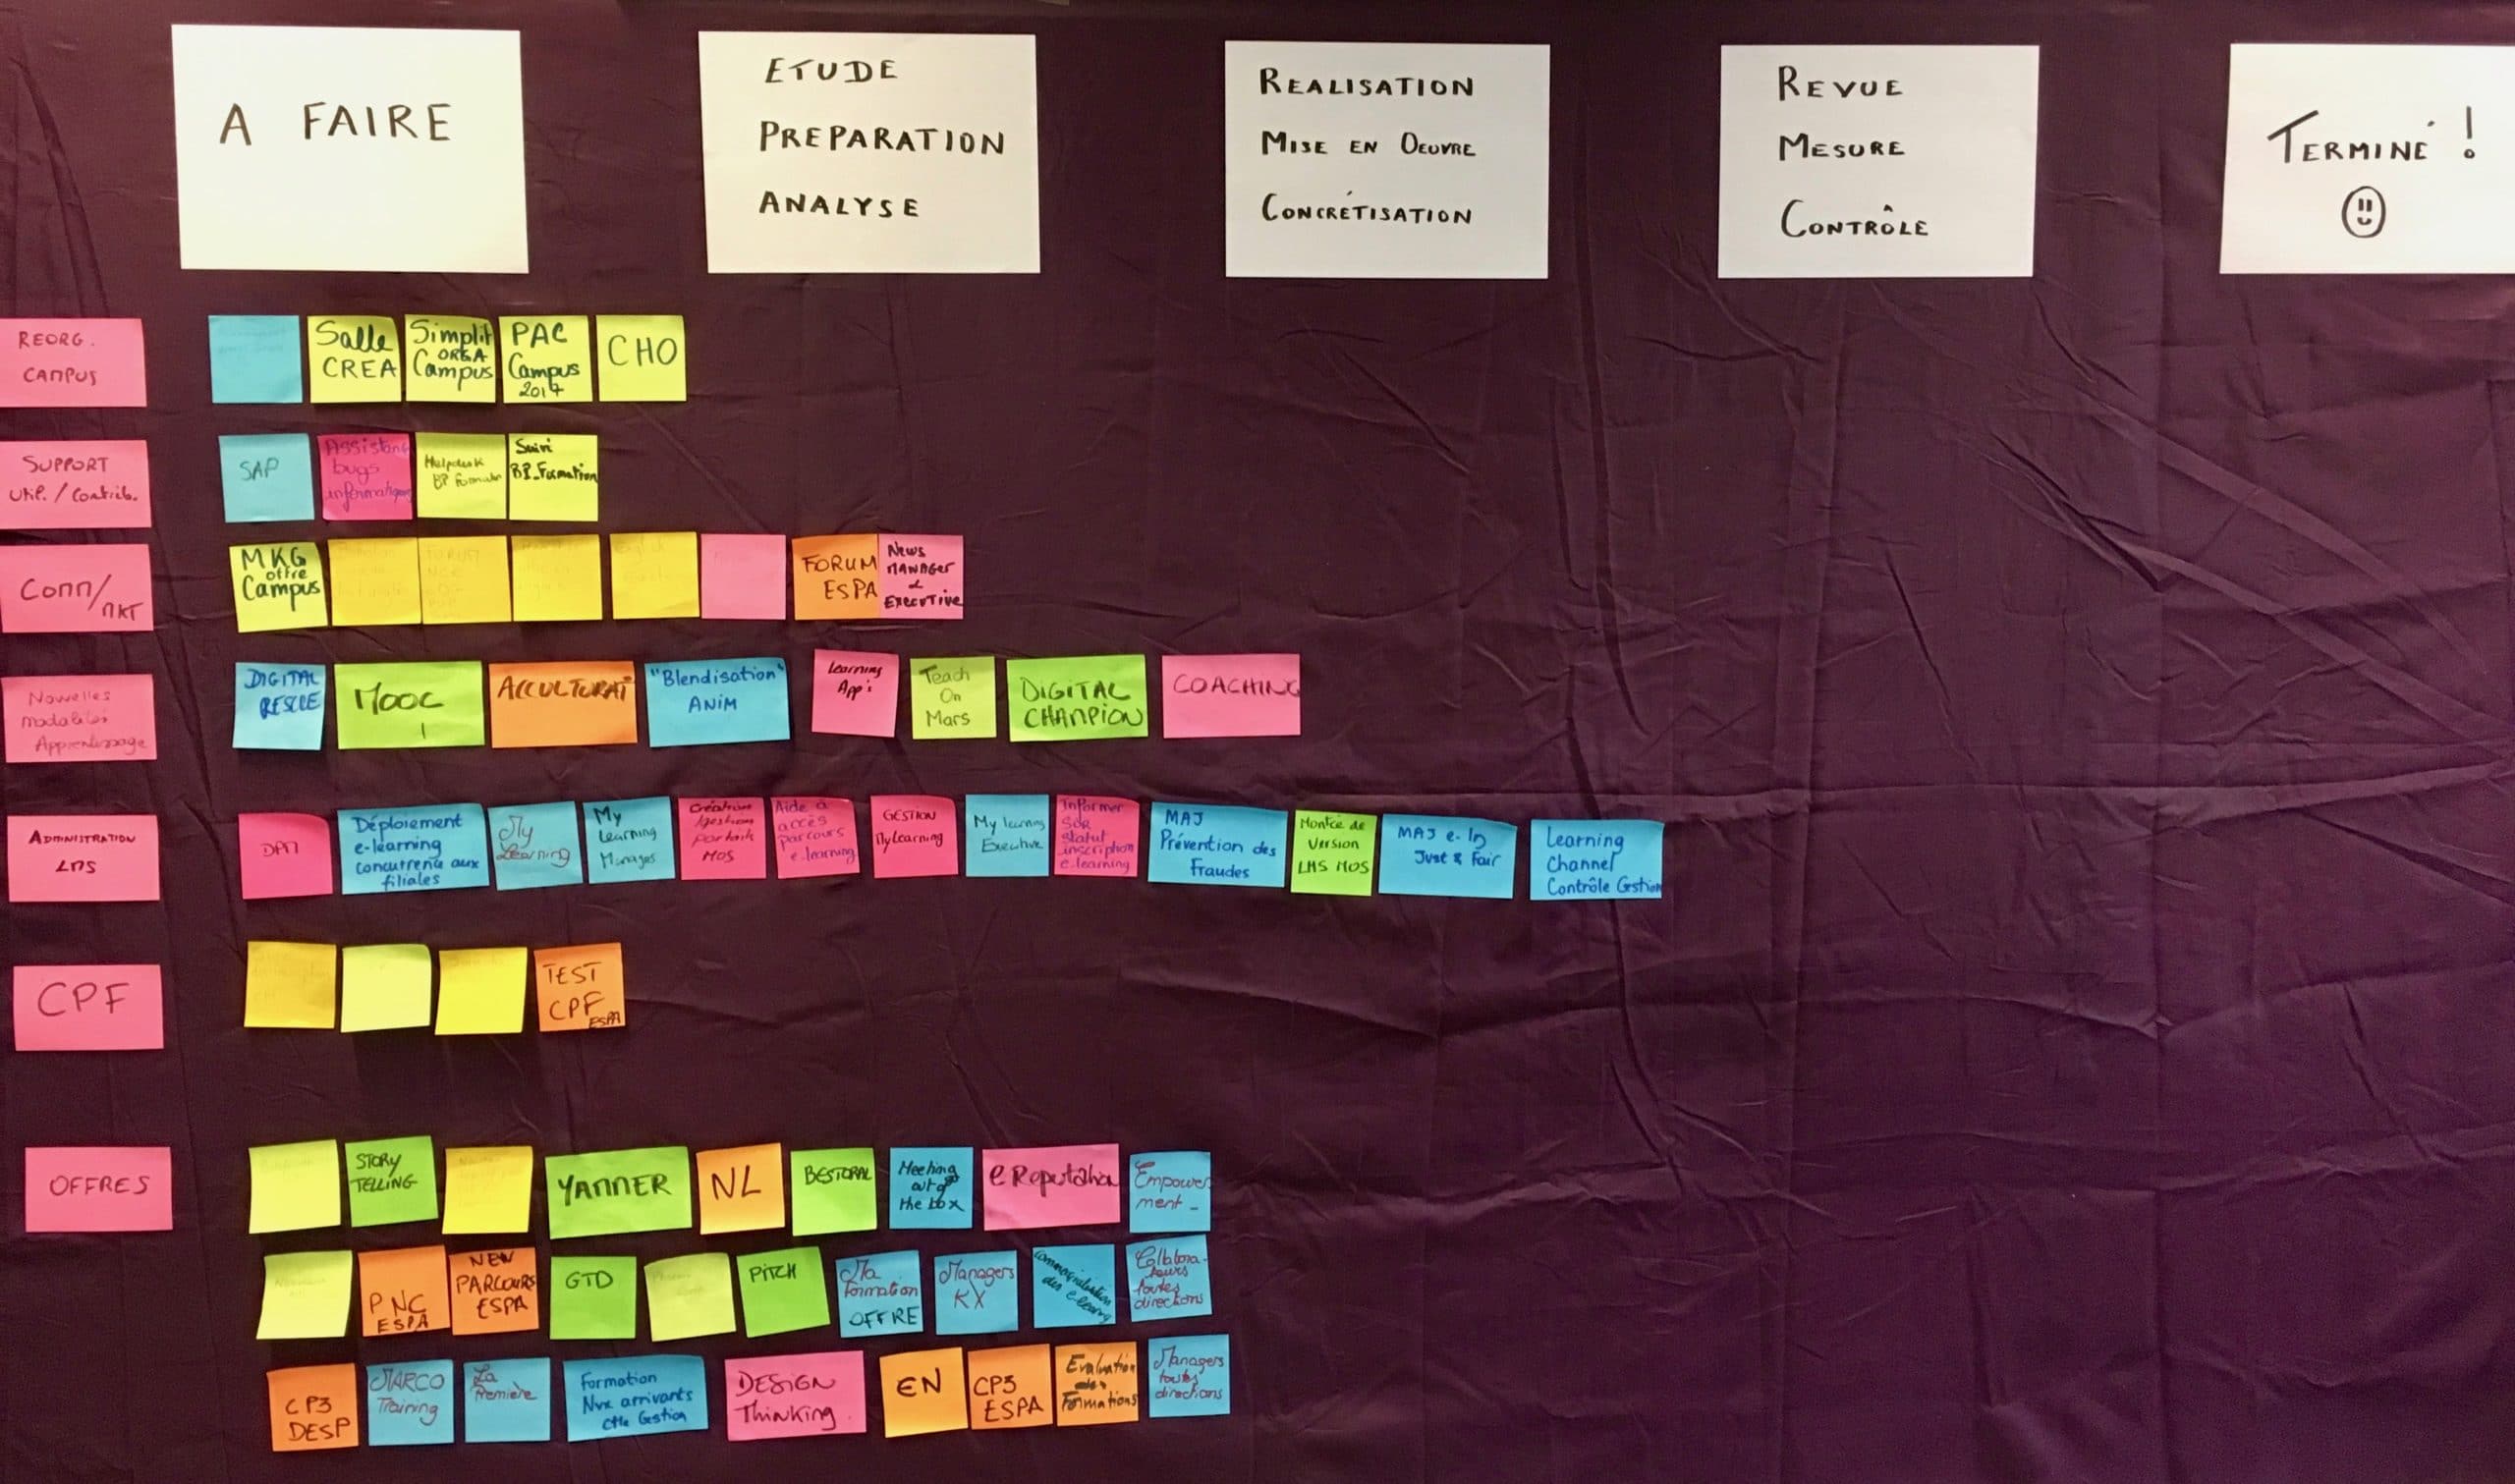
Il ne reste plus qu’à replacer les éléments de travail au bon endroit !
En ajoutant des colonnes, on obtient cela :
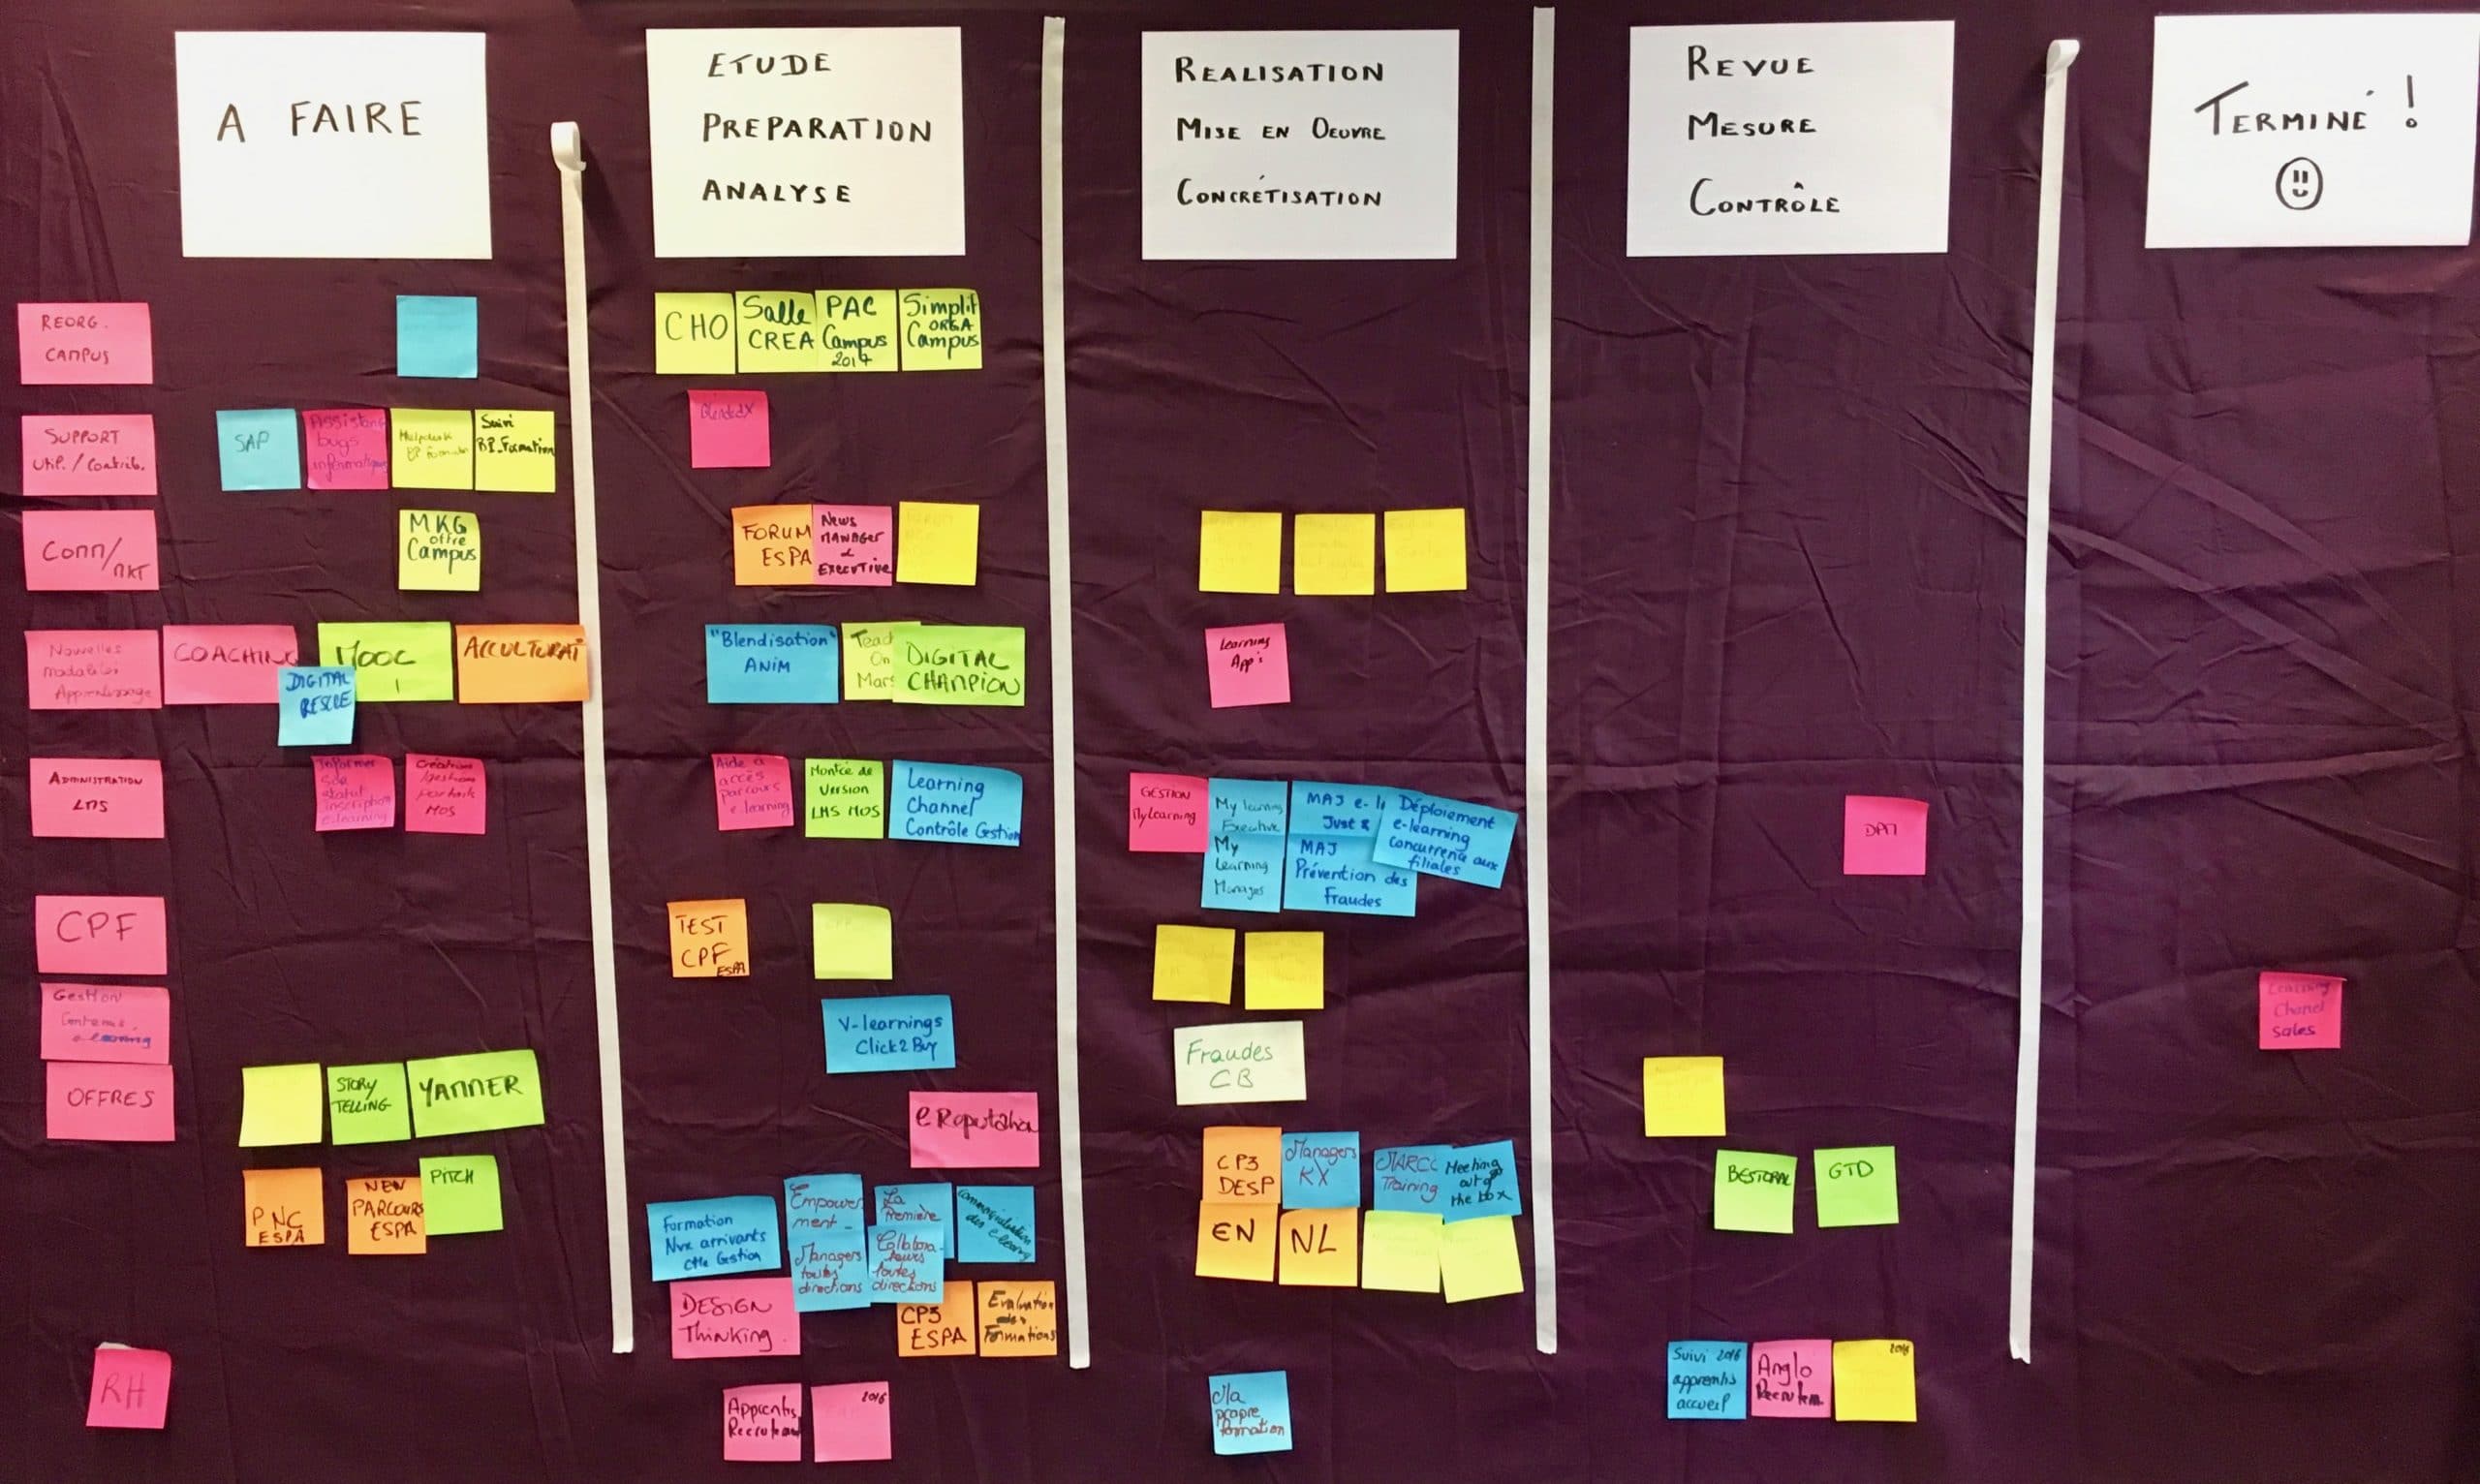
En ajoutant des lignes, on obtient cela :
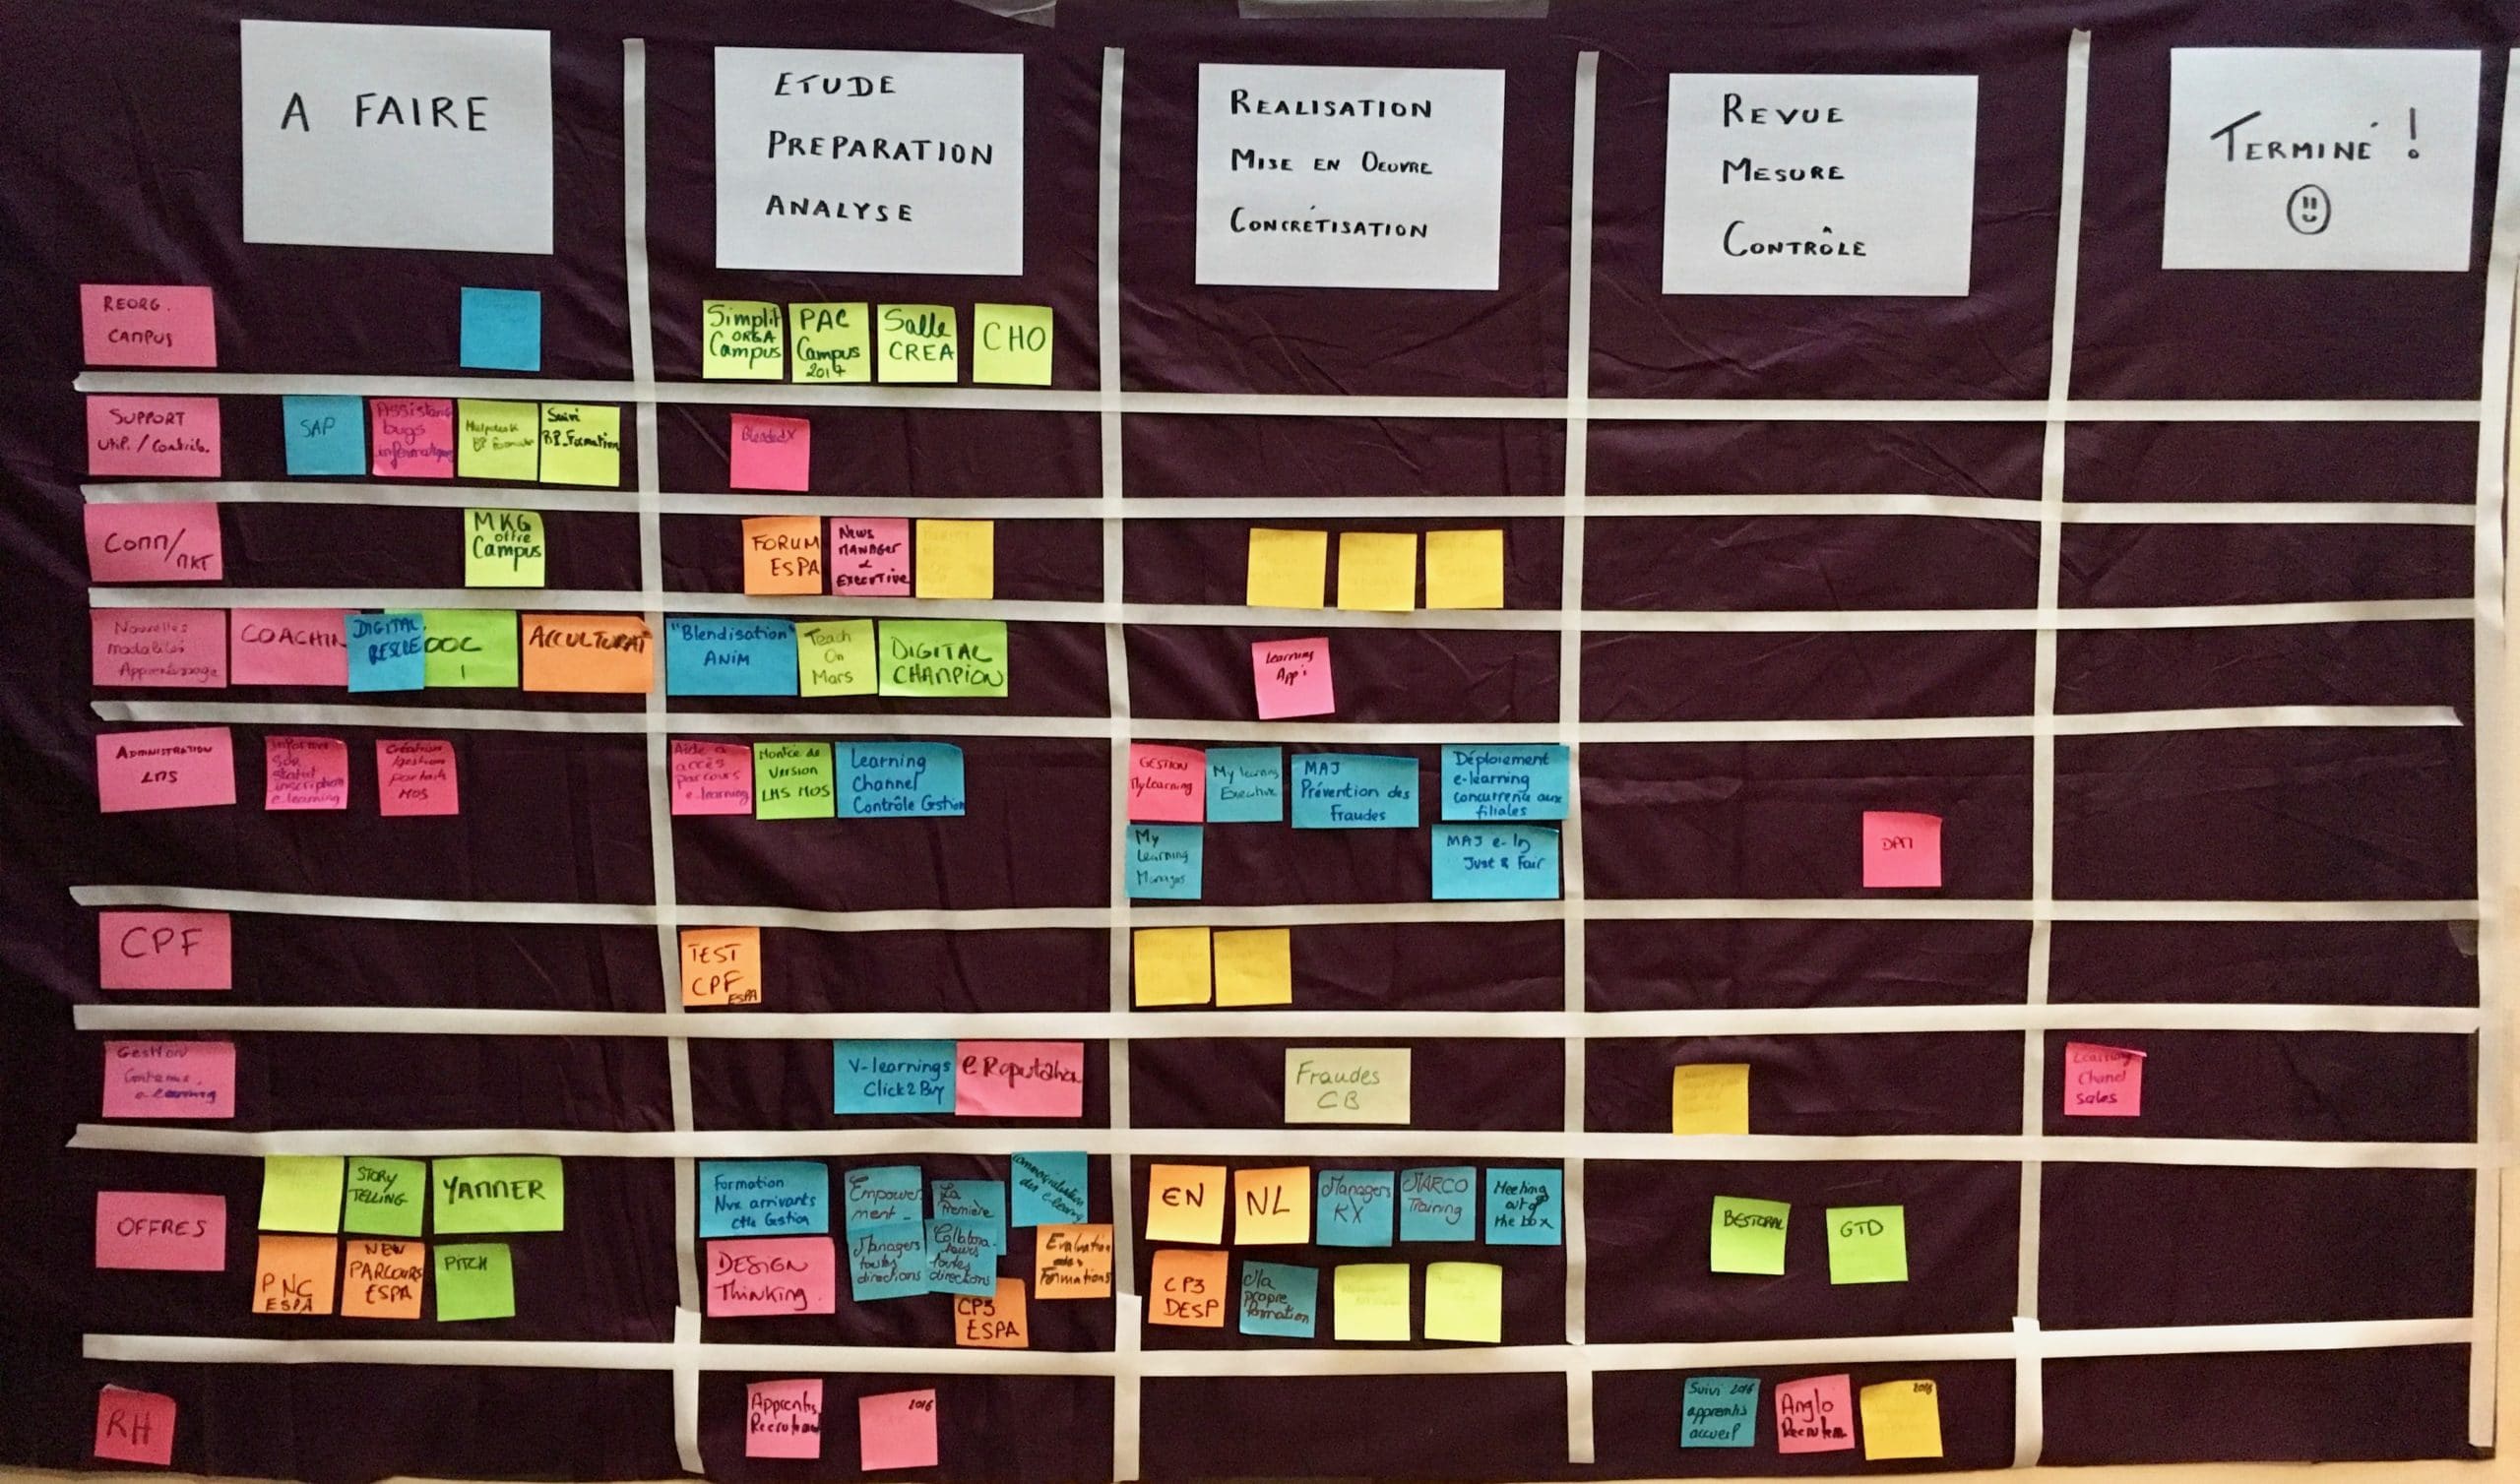
Ce sera donc la première version de Management Visuel que l’équipe utilisera pendant une semaine.
Étape 4 : Stand-up Meeting
Afin de rendre ce Management Visuel « actionnable », il est nécessaire de le combiner avec un Daily Meeting.
L’objectif du Daily meeting est de synchroniser le collectif afin de prendre les meilleures décisions ensemble.
Je propose au groupe d’utiliser un protocole différent de celui généralement mis en oeuvre dans les équipes Scrum.
On pose tout d’abord au groupe les questions suivantes :
- Le tableau est-il à jour ?
- Y a-t’il des éléments urgents ou nécessitant une attention particulière ?
On parcourt ensuite le flux de la sortie vers l’entrée (de la droite vers la gauche habituellement), en pointant du doigt chaque élément :
- Que lui manque t’il pour être terminé / avancer ?
La personne concernée prend généralement naturellement la parole.
- As-tu besoin d’aide ?
Si c’est le cas, la personne explicite son problème mais ne rentre pas dans sa résolution. Sinon on passe à l’élément suivant.
Le processus s’arrête lorsque tout le monde sait quoi faire pendant cette journée – ce qui implique que l’on ne passe pas forcément en revue l’intégralité du flux.
Étape 5 : Planifier
Le moment de planifier le Daily Meeting est une étape essentielle et générant souvent beaucoup d’échanges.
Dans le cadre de ce workshop, je demande au groupe d’effectuer un vrai Daily Meeting, donc TOUS LES JOURS ! Le débat tourne donc plus autour de l’horaire que de la date.
Note : Cette période d’expérimentation est cruciale pour permettre au collectif d’apprendre et de créer une habitude. Dans notre cas, il est possible d’argumenter en expliquant qu’au pire, ce ne sera que pour une semaine 😉
Étape 6 : Expérimenter

La phase d’expérimentation dure une semaine avant le prochain Workshop de mise en oeuvre. Chaque jour, l’équipe va donc pratiquer le Daily Meeting auquel j’assisterais tout au long de la semaine.
Je demande à chacun de prévoir 30 minutes pour chaque Daily : 15 minutes de pratique + 15 minutes de débriefing.
L’organisation est plutôt simple :
- Daily 1 : Animation effectuée par moi pour donner un exemple de facilitation.
- Daily 2 à 5 : Animation effectuée par une personne différente avec moi en observateur / support.
L’équipe acquiert ainsi une expérience terrain lui permettant d’apprendre et de prendre un peu de recul sur les apports de la démarche. Tous ces éléments seront amenés dans le cadre du second workshop de mise en oeuvre, l’occasion d’utiliser cette énergie pour améliorer cette première version de Management Visuel.
Conclusion
Le premier workshop de mise en oeuvre a pour objectif d’initialiser la première version du Management Visuel de l’équipe. C’est une bonne occasion pour l’équipe de construire quelque chose ensemble, ce quelque chose étant un outil matérialisant leur collaboration future.
Le résultat obtenu a donc autant d’importance que le processus même de co-construction.
Je décrirais le prochain atelier dans lequel nous étendrons cette première version de Management Visuel dans le prochain article ! 😉





Une réponse
Olivier nous accompagne avec mon équipe depuis plusieurs, sous ce format léger et je dois reconnaître l’effet surprenant de la démarche : renforcement du partage, de la cohésion d’équipe, début de priorisation effort vs impact. Tout ce qui n’était pas naturel le devient petit à petit et les stand up meetings sont bien suivis.
À suivre dans la durée mais impressionnant d’efficacité …